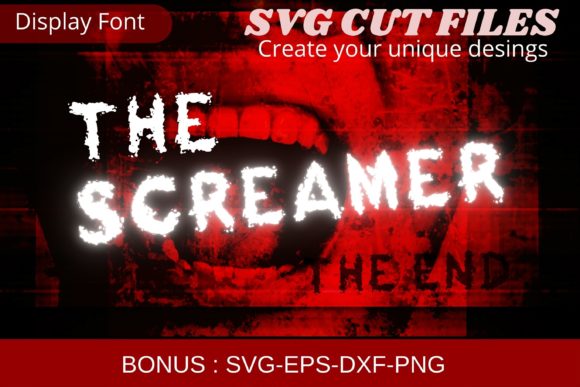
The Screamer Font: A Web Designer’s Layout Review
I was staring at a hero section for a niche horror podcast website last Tuesday, and something felt off. The layout was grid-perfect, the color palette was moody, and the imagery was atmospheric, but the headline looked too safe. It lacked the visceral, unsettling texture that the brand promised. That is when I decided to test The Screamer in a live staging environment. As web designers, we often default to clean sans serif fonts or elegant serifs for safety, but sometimes a project demands a typeface that feels dangerous. Testing this unique display font revealed exactly where it shines in digital interfaces and where it requires careful UX consideration.
The Screamer is not a background player; it is a loud, sketchy, and intentionally distressed typeface that commands immediate attention. In my testing across various viewport sizes, it became clear that this font carries a specific emotional weight. It reads like a ransom note or a frantic warning, which makes it incredibly effective for brands leaning into alternative aesthetics, thriller genres, or edgy creative portfolios. However, bringing such a high-impact font into a responsive web environment requires more than just dropping it into a CSS file. It demands a strategic approach to hierarchy, pairing, and accessibility to ensure the site remains functional while delivering that intended shock value.
Evaluating Visual Hierarchy in Hero Sections
The primary use case for The Screamer in web design is undoubtedly the hero header. When I applied it to an H1 tag on a dark-mode landing page, the sketchy edges created a beautiful contrast against the solid background. Unlike smooth vector fonts that can sometimes look flat on screens, The Screamer has an inherent texture that mimics analog distress. This adds a layer of depth to digital designs without requiring heavy image overlays or complex CSS effects.
However, scale matters immensely. On desktop, setting the font size between 4rem and 6rem allowed the jagged details to remain crisp. When I scaled it down below 3rem, the intricate distressing began to muddy, making the letters harder to parse quickly. For mobile layouts, I found that using The Screamer for short, punchy phrases (three to four words maximum) worked best. Long headlines in this typeface create visual noise that increases cognitive load. Users scan hero sections in milliseconds; if they have to squint to decipher a sketchy letterform, they will bounce. I recommend reserving this font strictly for top-level headings and avoiding it entirely for subheaders or navigation menus.
Strategic Font Pairing for Digital Readability
A font with this much personality cannot stand alone. During my review, I tested several pairings to find the right balance between atmosphere and usability. The goal is to let The Screamer set the mood while a secondary typeface handles the information architecture.
- Clean Sans Serif: Pairing The Screamer with a geometric sans serif like Inter or DM Sans creates a modern tension. The stability of the body text grounds the chaos of the display font, making the content feel professional rather than amateurish.
- Monospace Fonts: For a more brutalist or tech-horror aesthetic, a monospace font works surprisingly well. It reinforces the "raw data" or "classified document" vibe that The Screamer initiates, perfect for portfolio sites or experimental art projects.
- Neutral Serif: If you are designing for a publishing platform or a blog with an editorial twist, a classic serif provides necessary legibility for long-form reading while allowing the headlines to retain their edge.
I strongly advise against pairing The Screamer with other decorative fonts, scripts, or handwritten styles. The visual competition destroys readability and makes the interface feel cluttered. Let the display font be the singular moment of drama on the screen.
Responsive Performance and Accessibility Considerations
Web design is ultimately about user experience, and using a distressed font introduces specific accessibility challenges. When implementing The Screamer, you must be vigilant about contrast ratios. Because the letterforms have gaps and rough edges, standard contrast checkers might give false positives. A white instance of The Screamer on a black background might technically pass WCAG AA standards, but the broken strokes can still reduce perceived legibility for users with visual impairments.
In my testing, I increased the contrast beyond the minimum requirements to compensate for the texture loss. I also adjusted the line-height significantly. Display fonts often have tight default spacing, but The Screamer needs room to breathe. Increasing the line-height to 1.2 or even 1.3 prevented the jagged ascenders and descenders from colliding, which improved scanning speed on both mobile and desktop.
It is also crucial to consider loading performance. Distressed fonts often have complex vector paths, resulting in larger file sizes. Always subset your webfont files to include only the characters you actually need. I used a tool to strip out unused glyphs and reduced the file size by nearly 40%, ensuring the hero text painted instantly without causing a layout shift. Never sacrifice Core Web Vitals for typography; if the font takes three seconds to load, the user has already missed the impact.
Best Use Cases Beyond the Homepage
While hero sections are the obvious choice, I found several other effective applications for The Screamer during my review. It performs exceptionally well in digital advertising graphics and social media templates where stopping the scroll is the primary metric. The sketchy texture stands out in crowded feeds where polished, corporate typography blends together.
For e-commerce sites selling alternative fashion, vinyl records, or niche collectibles, using The Screamer for category titles or limited-edition badges creates instant brand alignment. It signals to the visitor that they are in the right place before they even read the product description. I also tested it on a 404 error page, where the playful, scary tone turned a frustrating user experience into a memorable brand moment. These micro-interactions are where personality fonts truly add value without compromising the core utility of the site.
Licensing and Technical Implementation Checklist
Before committing The Screamer to a client project or your own digital product, verify the technical and legal details. Commercial font licensing for web use differs from desktop licensing. Ensure your license covers the expected monthly pageviews and includes permission for embedding via @font-face. Some licenses restrict usage in digital ads or app interfaces, so read the EULA carefully if you plan to extend the branding beyond the website.
Check the included file formats as well. For modern web design, WOFF2 is the gold standard for compression and performance. If the font package only includes OTF or TTF files, you will need to convert them and verify that the conversion process does not degrade the delicate sketchy details. Also, review the character set. Many display fonts lack extended language support or special characters. If your site serves a multilingual audience, confirm that The Screamer supports the necessary accented characters, or have a fallback strategy ready for those specific languages.
Ultimately, The Screamer is a powerful tool for web designers willing to prioritize atmosphere alongside function. It transforms generic layouts into immersive experiences, provided you respect its limitations. By treating it as a specialized accent rather than a workhorse, maintaining rigorous accessibility standards, and pairing it with stable supporting typography, you can harness its unique energy to build digital brands that are impossible to ignore. Just remember: in web design, the scream should be visual, not auditory, and it should never drown out the message.